
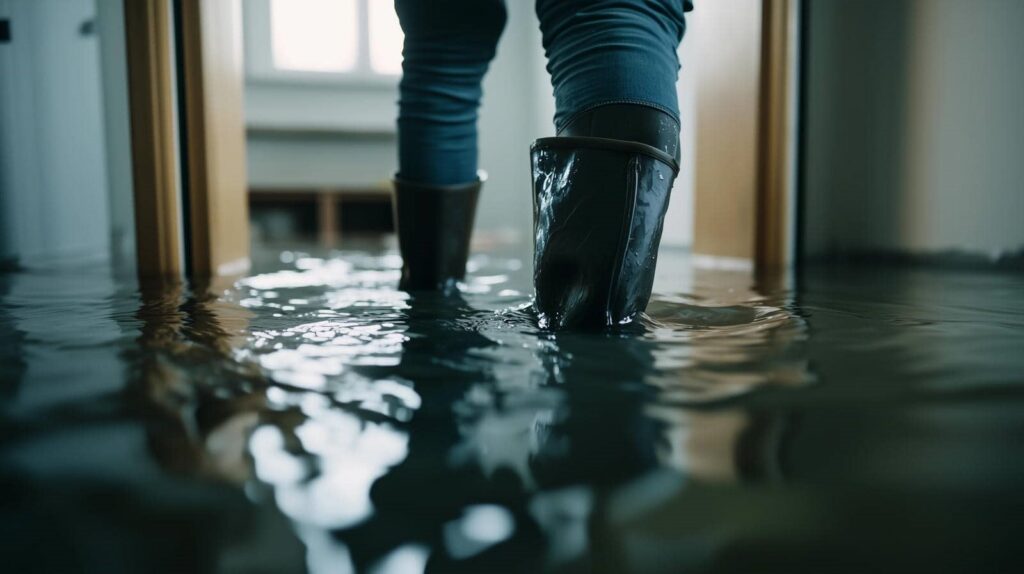
Can you really restore hardwood floors after water damage without replacement? You can, but only if you assess moisture levels, stop the spread, and dry the boards correctly first. Then you need to check for cupping, crowning, and warped planks before deciding whether to repair, replace, or refinish. The difference between a salvageable floor and a costly failure often comes down to one hidden detail.
Key Takeaways
- Inspect the floor for cupping, crowning, staining, seam gaps, and soft spots using a moisture meter.
- Stop the water source, remove rugs and furniture, and dry the area quickly with fans and dehumidifiers.
- Replace severely warped, swollen, or structurally weak boards; repair only minor damage by sanding and fastening.
- Prepare the surface by cleaning, leveling raised edges, and refinishing with stain, sealer, and durable topcoat.
- Prevent future damage by keeping humidity controlled, wiping spills fast, and calling a pro for soft floors or musty odors.
How Severe Is the Hardwood Floor Damage?
How severe is the hardwood floor damage? You need to inspect each board for cupping, crowning, staining, and separation at the seams.
Press a moisture meter into unaffected and affected areas, and compare readings to confirm whether the wood has absorbed excess water. If you notice surface discoloration, raised edges, or soft spots, document the pattern so you can evaluate whether the damage is limited or widespread.
Water damage restoration for hardwood floors works best when you identify the extent early, because minor moisture imbalance may resolve with controlled drying, while deeper saturation often signals structural distortion.
Check subfloor contact, baseboard condition, and finish failure. By determining severity carefully, you can choose the right repair path and protect your floor’s integrity.
Stop the Water From Spreading
Shut off the water source immediately and, if needed, turn off power to the affected area before you move anything else.
Then contain the spread by placing towels, absorbent cloths, or a wet vacuum at the leading edge of the water. You should block doorways with rolled towels to keep runoff from reaching adjoining rooms.
Remove lightweight rugs, mats, and furniture only if you can do so without dragging moisture across the boards. If the leak comes from plumbing, collect the source in a bucket or pan and check nearby cabinets, vents, and trim for migration.
Work methodically, and keep foot traffic low so you don’t push water deeper into seams. Acting fast helps protect your floor and keeps your home’s recovery on track together.
Dry Hardwood Floors Properly
Once you’ve contained the leak, start drying the hardwood immediately to limit warping, cupping, and moisture intrusion into the subfloor.
Open windows if outdoor humidity is lower, then run dehumidifiers to pull moisture from the room. Position high-velocity fans to move air across the floor, not directly into seams, and keep the equipment running continuously.
Remove rugs, furniture, and baseboard trim so air can circulate freely. If water reached the edges, lift a few planks only if you can do it safely and resecure them later.
Check the room’s temperature and humidity daily and keep conditions stable. You’re doing the right thing by acting fast; careful drying gives your floors the best chance to recover as a unified surface.
Check for Cupping, Crowning, and Warping
Inspect each board for cupping, where the edges rise higher than the center.
Check for crowning by running a straightedge across the floor to see if the center sits higher than the edges, and look for warped planks that twist, bow, or no longer lie flat.
These defects usually signal moisture imbalance, so you should document their location and severity before you continue restoration.
Identifying Cupped Boards
When hardwood takes on moisture unevenly, the boards can show cupping, crowning, or warping, and you need to identify which condition is present before you plan repairs.
To spot cupped boards, inspect each plank edge to edge with a straightedge or your eye at floor level. You’ll see the board’s sides rise higher than its center, forming a shallow channel across the width. Run your hand over the surface; the seams may feel slightly elevated.
Measure moisture in the flooring and subfloor, then compare readings in affected and unaffected areas. Mark boards that show consistent edge lift, because that pattern signals active moisture stress.
If you’re working with a team, share your findings clearly so everyone targets the same damaged sections and you keep the restoration process organized.
Spotting Crowned Surfaces
Cupping isn’t the only moisture-related shape change you need to watch for; crowned boards can signal a different kind of stress in the floor system.
You should inspect each plank under raking light and run a straightedge across the surface to spot a high center. Crowning means the board edges sit lower than the middle, often after the top face has absorbed more moisture than the underside.
Compare adjacent boards so you can see whether the pattern is localized or widespread. Mark any lifted crowns, then record humidity, temperature, and recent water exposure for the room.
When you document these details, you help your restoration team work from the same facts, speak the same language, and choose the right drying strategy before the floor settles further.
Detecting Warped Planks
How do you tell whether a hardwood plank has warped? You inspect each board under side light and run a straightedge across its width and length.
If the center sits higher than the edges, you’re seeing crowning; if the edges rise and the center dips, you’ve got cupping.
Check for twisting, uneven seams, and boards that rock underfoot, because those signal true warping.
Use a moisture meter on damaged and adjacent planks, then compare readings with the subfloor.
Mark any board that stays out of plane after drying, since those boards may need replacement.
Work methodically so you and your crew can document the pattern, isolate the source, and restore the floor with confidence, not guesswork.
Repair or Replace Damaged Boards
After you assess the extent of the water damage, you’ll need to decide whether to repair individual boards or replace them entirely. If the board is only slightly cupped, split, or lifted at the edges, you can often sand, clamp, and fasten it back into place once it’s dry.
Choose replacement when the board shows deep deformation, swollen tongues, or structural weakness. Match species, thickness, and grain before installing a new piece so the floor stays consistent.
- Lift one board with a pry bar for inspection.
- Compare moisture readings across nearby planks.
- Keep spare boards from the same lot nearby.
You’re protecting the whole floor, not just one section. Work carefully, and you’ll keep your repair solid, aligned, and ready for the next step.
Remove Mold, Stains, and Odors
Once the wood is dry and structurally sound, remove any mold, staining, and lingering odor before refinishing.
Wear gloves, eye protection, and a respirator, then vacuum the surface with a HEPA unit to capture spores and debris.
Clean affected areas with a hardwood-safe antimicrobial solution, following label dwell time, and wipe dry with clean cloths.
For dark water stains, apply a wood stain remover or oxalic acid solution only to the discolored area, then neutralize and dry fully.
Improve airflow with fans and a dehumidifier so moisture doesn’t return.
If odors persist, use a low-odor enzyme treatment approved for flooring.
You’re preserving both the floor and your home’s shared comfort when you clean thoroughly and verify that every treated section stays dry.
Sand and Refinish Hardwood Floors
You’ll need to sand the damaged surface evenly to remove raised grain, stains, and minor warping before any finish work begins.
After sanding, apply a compatible refinishing system to seal moisture-exposed wood and restore a stable wear layer.
Match the original floor finish as closely as possible so the repaired sections blend with the surrounding boards.
Sanding Damaged Surfaces
Sanding removes the damaged top layer of a hardwood floor so you can address water-related warping, cupping, staining, and surface roughness before refinishing. You should inspect each board, verify dryness, and choose the grit sequence that levels high spots without cutting too deeply.
Work with the grain, keep the sander moving, and vacuum dust between passes to maintain a clean, even cut. You’ll protect the floor’s structure and give your crew a consistent surface to restore.
- Feather raised edges where boards met standing water.
- Blend stained patches into surrounding wood.
- Remove fuzz, splinters, and minor distortions.
When you prepare the surface this way, you’re setting up a safer, more reliable repair that helps your floor feel whole again.
Refinishing For Moisture Repair
After sanding has exposed a clean, level surface, you can begin refinishing to seal out residual moisture and restore the floor’s protective layer.
Verify the wood’s moisture content with a meter before you apply any coating; it should be stable and within the manufacturer’s range.
Then vacuum thoroughly and tack the boards to remove dust that could weaken adhesion.
Choose a compatible stain or sealer, and apply it in thin, even coats with the grain.
Allow each coat to dry fully, then lightly abrade if the product calls for it.
Finish with a durable topcoat to resist future spills and humidity.
Matching Original Floor Finish
To match the original floor finish, start by evaluating the existing sheen, color, and grain pattern so your repair blends with the surrounding boards.
Then sand a small test area and compare the exposed wood under the same lighting you see daily. Choose stain and topcoat samples that match the floor’s age and wear, not just its catalog color.
Apply thin coats and maintain even pressure so you don’t create obvious boundary lines.
- Check gloss at window light and room edges.
- Blend stain with a feathered application into adjacent boards.
- Seal with the same finish type, such as oil or water based.
When you work methodically, your floor keeps its unified look, and you’ll feel confident your space still belongs together.
Prevent Future Hardwood Water Damage
Even after restoration, you should reduce future water exposure to protect hardwood from warping, cupping, and hidden moisture buildup.
Keep indoor humidity between 30% and 60% with a dehumidifier or HVAC settings, and monitor it with a hygrometer. Wipe spills immediately, then dry the area at the joints.
Place mats at entrances, sinks, and appliance zones to trap tracked-in moisture. Use felt pads under furniture so you don’t scratch the finish when you move items during cleaning.
Check caulking around tubs, dishwashers, and windows, and reseal gaps before leaks spread. Run exhaust fans during cooking and bathing to lower ambient moisture.
If you share your space with family or roommates, make these habits part of everyone’s routine so your floor stays stable, clean, and protected.
When to Call a Hardwood Floor Pro
Call a hardwood floor pro when water has soaked into seams, boards are lifting or cupping, or the finish stays dull and swollen after drying.
You need expert evaluation when the floor still feels soft, smells musty, or shows dark edge lines that spread. A trained technician can test moisture, map damage, and tell you whether sanding, board replacement, or stabilization is the safest path.
- Buckled planks near a doorway
- Hidden moisture under baseboards
- Gaps that widen as the room dries
Trust a pro if the affected area keeps changing after 48 hours. You’re not alone in this; getting help early protects the floor’s structure and helps your home feel solid again.
What Water Damage Repair Costs and Takes
Your water damage repair cost depends on the affected square footage, the depth of moisture intrusion, the need for board replacement, and any subfloor drying or mold remediation.
You can expect the timeline to range from a few days for minor surface damage to several weeks when you need structural drying, sanding, and refinishing.
The restoration scope may stay limited to spot repair, or it may expand to full-board removal and replacement if warping, cupping, or persistent moisture has spread.
Cost Factors Explained
Water damage repair costs for hardwood floors depend on how much moisture has penetrated the wood, how quickly you start drying, and whether the boards have begun to warp, cup, or swell.
You’ll usually pay more when damage reaches the subfloor or finish layer, because technicians must inspect, extract, dry, and stabilize each section. Labor rates, equipment use, and material replacement also shape the total.
To estimate your range, check these factors:
- Room size and affected square footage
- Wood species, thickness, and finish type
- Need for board replacement or sanding
If you act early, you can often limit restoration scope and keep your floor in the group of surfaces that recover cleanly.
Clear access and steady ventilation help crews work efficiently and reduce your costs.
Repair Timeline Expectations
Once you know the main cost drivers, the next question is how long hardwood floor repair will take.
You can expect the timeline to start with moisture readings, then drying, then stabilization before sanding or board work begins.
Minor surface drying may take a few days; deeper saturation often needs one to three weeks.
If your flooring has cupped or swollen, you’ll wait until readings return to safe levels, usually below 20% moisture.
After that, repairs and refinishing add several more days, plus curing time.
You’ll move faster when you document conditions early and keep airflow steady.
Your floor team should explain each stage so you know what’s next and you’re never guessing.
Restoration Scope Variations
Restoration scope changes the price and the timeline because not every hardwood floor needs the same level of intervention. You’ll usually see three paths:
- Light drying and monitoring when moisture sits in the finish
- Board replacement and sanding when cupping or staining has started
- Subfloor repair and full refinishing when water reached deeper layers
Your cost rises with square footage, labor, drying equipment, and finish matching. You also pay more when you need dehumidifiers, moisture testing, or mold prevention.
Smaller, fast-dried areas often return to service sooner, while widespread saturation can take days or weeks. You belong in the group that acts early: document damage, isolate the area, and call a pro who measures moisture before work begins.
Frequently Asked Questions
Can I Walk on Hardwood Floors During the Drying Process?
You can walk on hardwood floors during drying only if you absolutely must, and then wear clean, soft-soled shoes. Minimize traffic, avoid dragging furniture, and monitor moisture so you don’t worsen warping or cupping.
Will Insurance Cover Hardwood Floor Water Damage Repairs?
Yes, your insurance may cover repairs if the damage came from a sudden, accidental event. You’ll need to document moisture, file promptly, and review exclusions, since gradual leaks and neglect often aren’t covered.
How Long Before Hardwood Floors Return to Normal?
Typically, you’ll see hardwood floors stabilize within 1–4 weeks after drying, but full recovery can take longer. You should monitor moisture, control humidity, and act fast, or warping and cupping can become permanent.
Can I Use a Dehumidifier Without Removing the Flooring?
Yes, you can, and you should run it immediately. You’ll lower moisture, limit cupping and warping, and improve drying if you keep airflow moving and monitor floor moisture until readings stabilize.
Are Engineered Hardwood Floors Treated Differently Than Solid Wood?
Yes—engineered hardwood’s layered core changes the game; you’ll dry it faster, monitor moisture closely, and avoid over-sanding. Solid wood tolerates deeper refinishing, but both need prompt assessment so you can keep your floor’s tight-knit family intact.
Conclusion
You can restore water-damaged hardwood floors by acting fast, drying the area thoroughly, and checking for cupping, crowning, or warping. Replace boards that won’t recover, then sand and refinish to match the surface. Think of the process like tuning a precision instrument: every step affects the next. You’ll protect the floor by controlling indoor humidity, fixing leaks quickly, and cleaning spills right away. When damage is extensive, call a hardwood floor pro.